Know the Essentials of Knocking for New Cricket Bats
Imagine a ball hitting your face at a speed of 140 kph. Ouch!! That hurts badly. Now imagine a cricket bat in place of your face. But still, the bat stands much stronger than your (or anyone’s) face.
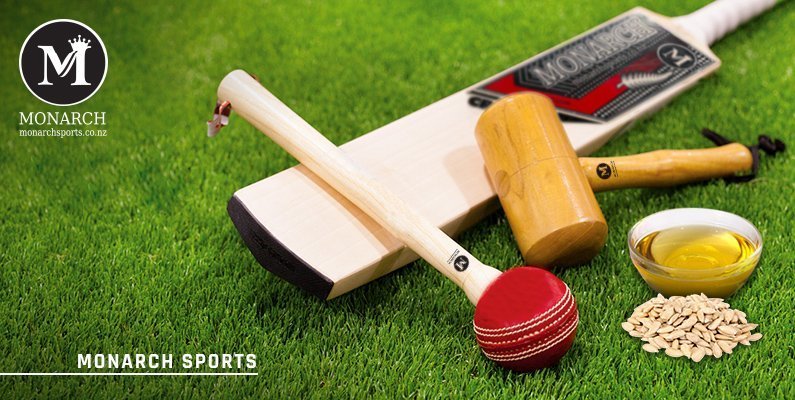
Most cricket bats are made of English willow (or Salix Alba Caerulea), a soft fibrous timber that possesses the perfect balance of characteristics required. The qualities of balance, durability, and power are further enhanced during the production of bats through timber drying & pressing.
Knocking & Its Need for New Cricket Bats
While the mechanical pressing converts soft timber into a hard resilient surface layer, the finished bat still needs a final hardening for complete protection & optimal performance. The final process that involves the hardening and conditioning of the surface of a bat’s blade is known as knocking in. There are two reasons for why every new bat needs knocking, as listed below:
• Protection: Even though mechanical pressing hardens the surface, the timber still has some softness that can lead to cracks and breakage. Knocking in helps prevent cracks from occurring, and hence, increases the usable life of the bat.
• Performance: In addition to enhancing the protection, the process of knocking in improves the middle of the bat. The bigger and better middle makes the bat travel far, assisting batsmen in playing better and powerful shots.
Knocking In Your New Bat the Right Way
Since a bat can be hardened solely by mechanical pressing, it would compress the wood too deep, resulting in a smaller middle and lower performance. Thus, it is essential to knock in your new bat with a mallet by hand. The right knocking process would take hours to complete. It is advised to consult a professional before moving ahead if you are not confident about doing it yourself.
1. Take 2-3 teaspoons of raw linseed oil and apply it evenly on the face, back and edges of the bat. Here, you need to take care not to apply oil on the handle, labelled areas, or the splice (the area where handle fits into the blade). Also, make sure that you don’t apply more than required oil as this will lead to dead timber fibres and negatively affect performance.
2. Let the bat rest for 24 hours to dry, placed horizontally with its face up.
3. If you are planning to add a protective anti-scuff sheet to your bat, proceed with the next step. In case of no anti-scuff sheet, repeat the above 2 steps twice.
4. After letting the bat dry, take a soft cloth and wipe off any excess oil that you see on the surface.
5. Next, take a specialist bat mallet to knock your bat for around 4 hours. Pay special attention to the blade’s toe and edges, and round off these areas using glancing blows off the face. Also, make sure that you don’t hit the back, toe, or edges directly as it may damage your bat.
6. While knocking in, increase the force gradually and not immediately and avoid damage with a hard force.
7. Apply fibre tape to the edges and anti-scuff sheet over the top.
8. Test the blade with throw downs or a light net session using an old ball of good quality. Further knocking may be required if any indentations or seem marks occur.
With this, your new bat is ready to perform in the field without worries of cracking or breaking during the play. Looking for a new bat to hit the bowlers hard in your next match? Get an exciting range of high-quality bats as per your style of playing, weight, and willow grading choice from Monarch Sports.

There are no comments